 |
| Prussians at the Battle of Langensalza 1866 |
Langensalza is a small 'training' scenario available from the
BBB Yahoo Group, and I decided to try it out using my ceramic blocks and Hexon terrain. Langensalza is interesting as the scenario is based on a paradox: the Prussians are outnumbered but obliged to attack in order to stop the Hanoverians from attacking and breaking through. This report will mean most to BBB players who are familiar with the scenario.
 |
| Clash of columns (Prussians: blue, Hanoverians: red). |
The Prussians must punch above their weight. The Prussian strategy implied by the scenario conditions is that they need to press across the Unstrut and keep up the pressure. As the Prussian player I fully intended to do this, but just didn't get the right movement dice for the Gotha regiment forming my vanguard. Next time I will keep my general closer to the troops I most need to move!
 |
| Having failed to retain the initiative, the Prussians deploy. |
This altered the whole dynamic of the scenario. There was now no point in attacking as the Hanoverians were free to cross the stream. I therefore switched to the defensive and deployed my marching forces as quickly as possible. The Gotha Regiment was already in the Mills & Spa, the 25th Regt moved into Langensalza, the 11th Gren Regt moved into the open country to my right, and the Landwehr, initially, just sat there. The Hanoverians began to come across the stream in all sectors.
 |
| The Hanovrians (3rd Brigade) advance across the Unstrut on my left. |
As I've already indicated this trial game was somewhat marred by a misunderstanding of the Disrupted Movement table which made units harder to rally. However, the handicap affected both sides and having read other AARs, I suspect that the general course of this game was not exceptional, which is why I'm reporting on it.
 |
| Von Bothmer's 4th Brigade is caught in flank. |
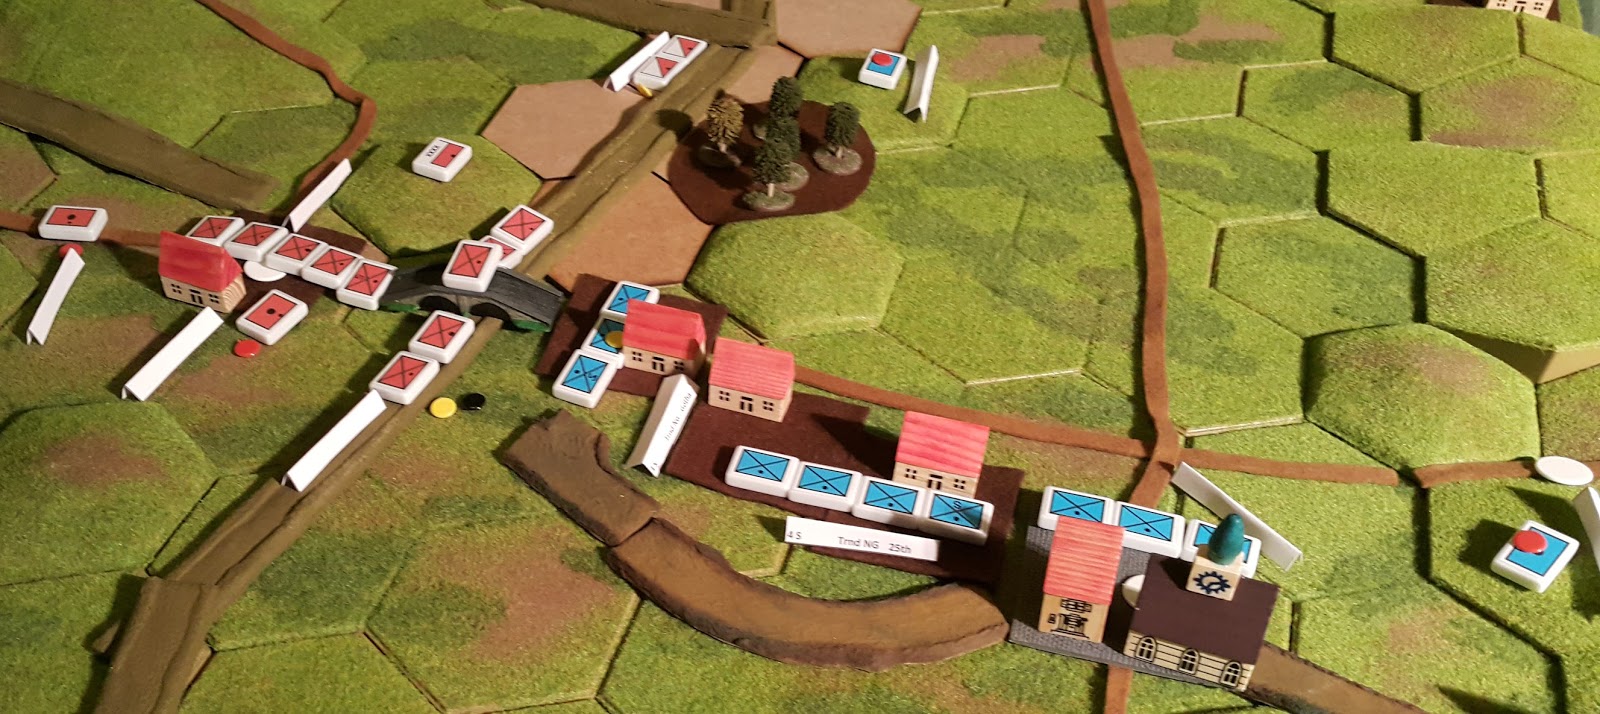
On my right flank the Hanoverians were a little too hasty in their advance and I caught them in the flank. The battle then focused on two main areas. In Langensalza and its suburbs, the superior numbers brought to bear by the Hanoverians gradually pushed the Prussians backwards leaving the Hanoverians with three of the four objectives. By the end of the fourth turn there was little to stop the Hanoverians from pushing on to the last objective.
 |
| The Prussian defence of Langensalza. |
However, on my right flank, the Hanoverians were being pushed back and it's possible that the 11th Gren Regt could have moved around the victorious Hanoverians and taken Merxleben (one of the objectives) in their rear. I think the Hanoverians could have sent a unit back to prevent this, giving the Hanoverians the victory, but my opponent conceded a draw.
 |
| The battle for Langensalza. |


No comments:
Post a Comment