Taking advantage of a rare opportunity to do some painting etc over the last couple of weeks, I have now just finished reorganising and rebasing the 10mm Normans that I inherited. Actually finishing a project is a big achievement for me these days.
This project involved:
- Soaking the old card bases in water and removing.
- Planning the new units.
- Adding a few additional figures for fun (crossbowmen and peasants with improvised weapons).
- Repainting some mail in silver and some textiles in colour.
- Sticking the figures on my preferred MDF/steel combination bases.
- Texturing the bases with Tetrion filler and a sand/ballast mix.
- Painting the bases.
- Applying 2mm static grass.
Most readers will be familiar with all these techniques and I've covered them all before. However, I will make a few relevant remarks.
 |
| Front left: Sergeants. Back left and centre: ordinary cavalry. Right: veteran cavalry. |
I like planning units and spent a lot of time doing it. The aim was to optimise use of the figures I had in order to produce two armies. In the end I went with 80mm wide bases to be used on a 100mm grid. This is for To the Strongest! Each base is a unit.
Repainting was fairly impressionistic. I hit the main areas. These are 10mm figures after all. Nobody should notice or care unless they lead very sad lives.
On the new figures, I painted faces but no hands. I might repaint some of the shields to provide more variation and I might add a dark wash to tone down the colours I used on some of the new figures, but I may never get round to it.
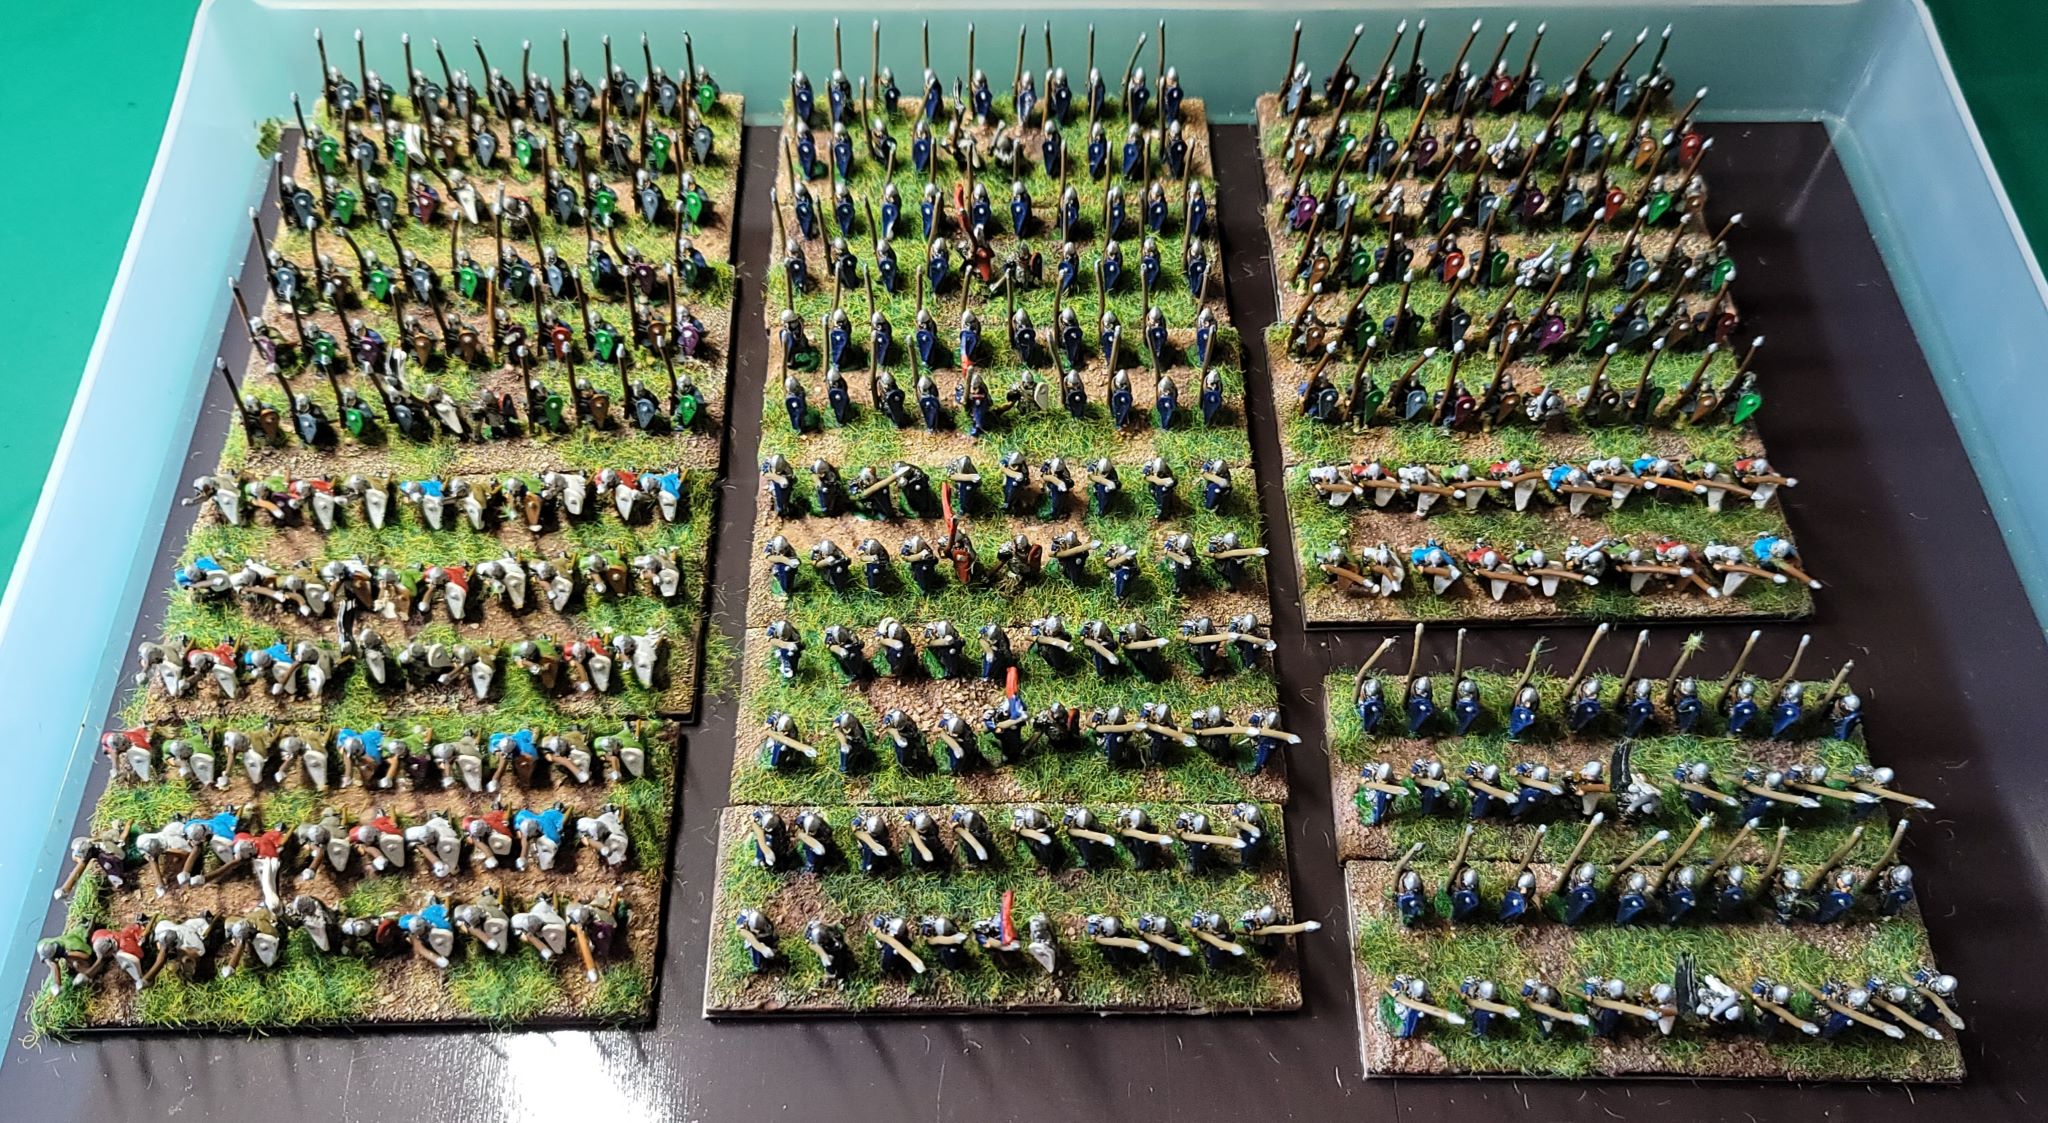 |
| Left to right, front to back: Fyrd; Foot Sergeants; Flemish Spearmen, Norman Militia. |
The sand was applied to the Tetrion while it was still wet. The best results are achieved by having the Tetrion very wet. But getting the filler between multibased ready-painted figures was awkward.
The bases were initially flood painted with a very dilute wash of household emulsion. The sand soaks it up. They were then dry-brushed with Zamesi Desert and Ushabti Bone.
The static grass was applied with an electric applicator. I'm not entirely convinced this made much difference but it didn't do any harm.
 |
| Left: Feudal levies. Front: Crossbows. Back: Bows. |
I learnt two lessons from this project:
- Basing the figures before painting as I did for my 10mm ACW and 6mm TYW armies is a much better approach for multibased figures. In this instance most of the figures were already painted so I wasn't working from scratch. I'm not sure, however, whether I would pre-base 15m or 28mm figures, but I would certainly think about it.
- Dry-brushing the bases in just two colours was adequate.
The overall approach was based on expending the minimum effort and time, and to rely on the new bases for aesthetic effect. In that it was a resounding success.
The units certainly look good on their new bases.
ReplyDeleteThey look great. 10mm always looks good in mass. My favourite scale.
ReplyDeleteWithin reason you can rescue or crown a lot of projects with good basing.
ReplyDeleteIt’s too late for me to restrict myself to one scale, but if I had my time again and wanted or needed to do so, I believe 10mm would be the best choice.
In the past (e.g. in relation to creating bases for Dux Bellorum) I've often agonised about ideal base frontages for different figure scales.
I'm now convinced that 80mm frontages are optimum for 10mm and 60mm for 6mm. They need to be at least that big to look good, but need be no bigger. 15mm also works for me with 80mm, but 120mm is probably more impressive. And by the same token, 28mm needs 120mm-180mm.